
반응형
안녕하세요 빵끗미에요
오늘은 아파치 컴파일하는 방법에 대해서 알아보도록 할게요
- 컴파일하기 전 필요한 패키지 설치
| yum -y install libxml2-devel openssl-devel pcre-devel curl-devel libjpeg-devel libpng-devel freetype-devel libmcrypt libmcrypt-devel mhash mhash-devel php-mysql mysql-devel bzip2-devel aspell-devel libtidy libtidy-devel libxslt libxslt-devel glibc-utils libtool-ltdl-devel libtool-ltdl-devel zlib-devel gcc gcc-c++ |
- 설치경로 (사용자마다 설치경로 다를 수 있음)
| # cd /usr/local/src | /usr/local/src 경로에 파일 다운로드 진행 |
- 기타 모듈 arp, arp-util, pcre 설치 (실제 다운로드하는 경로와 다를 수 있음)
| wget http://apache.mirror.cdnetworks.com/apr/apr-1.6.5.tar.gz wget http://apache.mirror.cdnetworks.com/apr/apr-util-1.6.1.tar.gz wget https://ftp.pcre.org/pub/pcre/pcre-8.10.tar.gz |
- apache 설치
| wget http://apache.tt.co.kr//httpd/httpd-2.4.41.tar.gz |
- 기타 모듈 및 httpd 압축 해제
| # tar zxvf apr-1.6.5.tar.gz # tar zxvf apr-util-1.6.1.tar.gz # tar zxvf pcre-8.10.tar.gz # tar zxvf httpd-2.4.41.tar.gz |
- 기타 모듈 및 httpd 컴파일 하기
| # cd apr-1.6.5 # ./configure --prefix=/usr/local/apr # make # make install |
| # cd apr-util.1.6.1 # ./configure --prefix=/usr/local/apr-util --with-apr=/usr/local/apr # make # make install |
| # cd pcre-8.10 # ./configure --prefix=/usr/local --enable-unicode-properties=yes # make # make install |
| # cd httpd-2.4.41 # ./configure --prefix=/usr/local/apache --enable-authn-alias --enable-cache --enable-file-cache --enable-mem-cache --enable-disk-cache --enable-mods-shared=most --enable-proxy=shared --enable-proxy-ajp=shared --enable-proxy-ajp=shared --enable-dav=shared --with-apr=/usr/local/apr/ --with-apr-util=/usr/local/apr-util/ --enable-ssl --enable-dav --enable-cgi --with-mpm=event --enable-cgid --enable-vhost-alias --enable-rewrite --enable-forward=shared --enable-proxy-connect=shared --enable-proxy-http=shared --enable-deflate=shared --enable-so --enable-headers=shared --enable-include=shared --enable-rewrite=shared # make # make install |
- 방화벽 오픈
웹 사이트는 80 포트가 오픈되어 있어야지 외부에서 접근이 가능하기 때문에 방화벽 오픈 작업이 필요하다. 또는 처음부터 방화벽을 중지하고 시작하는 경우도 있다.
| 명령어 | 설명 |
| # firewall-cmd --permanent --zone=public --add-port=80/tcp | 방화벽 포트 등록 |
| # firewall-cmd --reload | 등록된 포트 적용 |
| # systemctl stop firewalld | 방화벽 중지 |
- 아파치 실행
| # cd /usr/local/apache/bin # ./apachectl start # ./apachectl stop |
- 웹사이트 실행
1) 서버 내 사용 중인 로컬 IP를 조회한다.
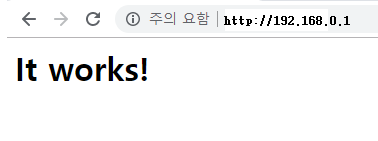
2) 웹 사이트에서 서버의 IP를 조회했을 때 기본 apache 페이지가 호출되는지 확인한다. 그림과 호출이 되었다면 정상적으로 설치 진행이 완료되었다.
| # ipconfig | 서버내 사용중이 IP를 조회 한다. |
 |
- 아파치 자동 실행 설정
서버 부팅 시 서비스를 자동으로 시작하기 위해서 아래와 같이 명령어를 사용한다.
| 명령어 | 설명 |
| # cp /usr/local/apache/bin/apachectl /etc/init.d/httpd |
apache의 실행 스크립트인 apachectl 을 /etc/init.d/httpd라는 이름으로 복사 한다. |
| # systemctl enable httpd |
서버 부팅 되었을 때 자동으로 httpd 활성화 한다. |
| # systemctl start httpd | 명령어를 통해서 httpd 시작 한다. |
| # systemctl stop httpd | 명령어를 통해서 httpd 중지 한다. |
| # systemctl list-unit-files --type service | 시스템 부팅 되었을 때 자동으로 시작되는 서비스 리스트 출력 한다. |
- 설치하는 과정에서 오류 나왔을 때
| 오류 내용 | 해결 방안 |
| error : checking whether to enable mod_deflate... configure: error: mod_deflate has been requested but can not be built due to prerequisite failures | # yum install zlib-devel |
| error : checking whether to enable mod_ssl... configure: error: mod_ssl has been requested but can not be built due to prerequisite failures | # yum install openssl-devel |
| error : rm:cannot remove ‘libtoolT’; No such file or directory |
# cp –arp libtool libtoolT 복사 후 ./configure --prefix=/usr/local/apr 명령어 다시 실행 |
반응형
댓글